
3 min read • By Leena Chitnis, Founder, Timberdog
Homemade DIY dog bed -- these are the words I typed into Google search some five years ago, because I couldn't find a pet bed that quite suited my dog's needs. Today, the RuffRest Ultimate Pet Bed™ - with its 14 travel features - goes with Kashi and I wherever we go -- we can't live without it!
If you're looking to create your own dog bed, specially made for your fur child, look no further. Here is a simple framework to make your own pet bed -- and you can add your own flourishes along the way.
-------------------------------------------- X -----------------------------------------------
Making your own homemade DIY dog bed can be a fun and rewarding project. Here's a step-by-step guide to help you create a cozy and comfortable bed for your furry friend:
Materials you will need:
1. Fabric of your choice (preferably durable and washable)
2. Sewing machine or needle and thread
3. Stuffing material (polyester fiberfill or foam)
4. Scissors
5. Measuring tape
6. Pins or clips
7. Velcro or zipper (optional)
Step 1: Determine the size
Measure your dog to determine the appropriate size for the bed. Consider your dog's size and sleeping habits. You want to ensure the bed is large enough for your dog to stretch out comfortably.
Step 2: Cut the fabric
Using your measurements, cut two rectangular pieces of fabric for the top and bottom of the bed. Add an additional 2-3 inches to each measurement to allow for seam allowances.
Step 3: Pin and sew
With the right sides of the fabric facing each other, pin the two pieces together along the edges, leaving one side open. Sew along the pinned edges using a sewing machine or needle and thread. Reinforce the corners by backstitching.
Step 4: Create a removable cover (optional)
If you want to make a removable cover for easy cleaning, you can attach Velcro or a zipper to the open side of the bed. Sew one side of the Velcro or zipper to the edges of the fabric, making sure it aligns properly.
Step 5: Turn the bed inside out
Reach inside the open side of the bed and carefully turn it inside out, so the right side of the fabric is now facing outwards.
Step 6: Stuff the bed
Stuff the bed with your chosen stuffing material, such as polyester fiberfill or foam. Fill it to your desired level of firmness or softness. Ensure that it's evenly distributed to provide comfort for your dog.
Step 7: Sew the open side
Fold the edges of the open side inward and pin them together. Use a sewing machine or needle and thread to sew the opening closed. Make sure to reinforce the stitching to prevent the stuffing from coming out.
Step 8: Finishing touches
Trim any loose threads and give the bed a final inspection to ensure all seams are secure.
Congratulations! You have successfully made a homemade DIY dog bed. Place it in your dog's favorite spot and watch them enjoy their new cozy sleeping space.
Too much work? Look into our RuffRest Ultimate Dog Bed and learn why we think it's the best dog bed in the world.
Note: If you're not comfortable with sewing or want a simpler option, you can repurpose an old pillow, cushion, or blanket by folding it into a comfortable shape and using a cover to protect it.
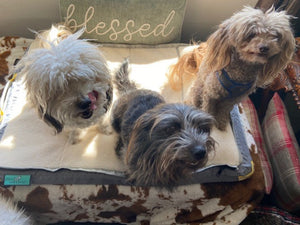
Photo credit: Julie Cooper, featuring (from L to R) Rocco, Otter Pup, and Joey